LLM Inference Optimization Part 4 — Production Serving
Production deployment with vLLM and TGI. Continuous Batching, Speculative Decoding, memory budget design, and throughput benchmarks.
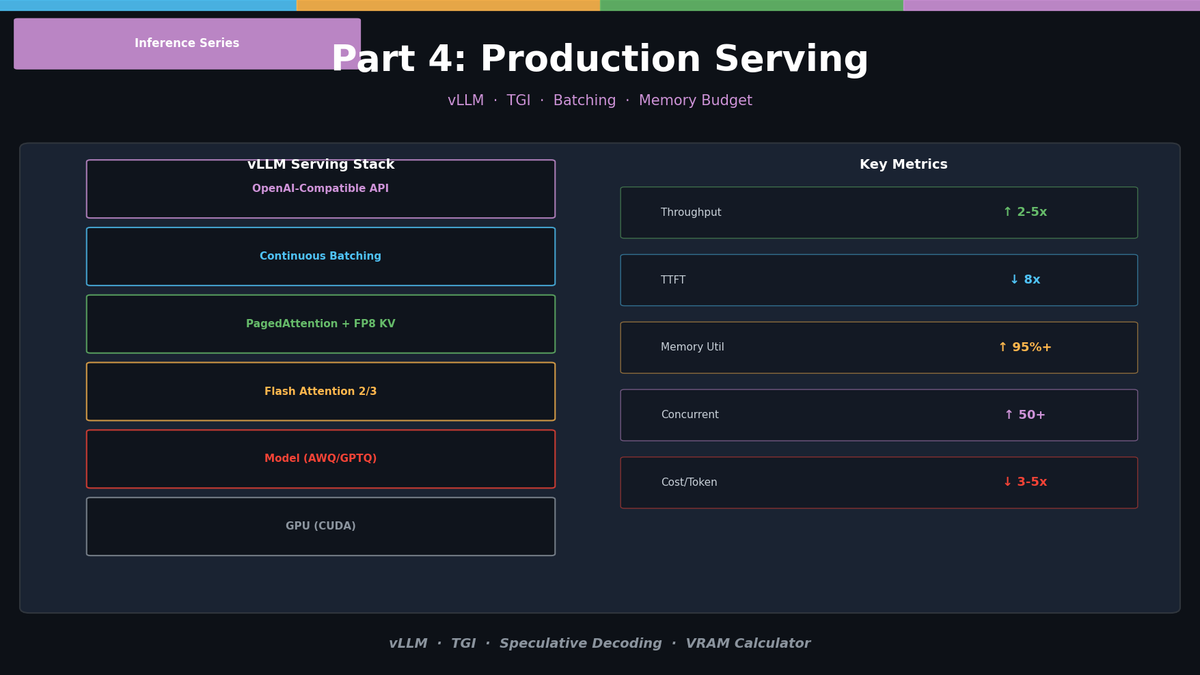
LLM Inference Optimization Part 4 — Production Serving
This is the final part of the series. Here we cover how to combine the Attention optimizations, KV Cache management, and Sparse Attention techniques from Parts 1–3 in a real production environment.
The key tools are vLLM and TGI (Text Generation Inference). We'll walk through how these two engines integrate the optimizations we've learned, and how to configure them in practice — with code.
vLLM vs TGI — At a Glance
| Feature | vLLM | TGI (HuggingFace) |
|---|---|---|
| PagedAttention | Built-in | Built-in |
| Continuous Batching | Supported | Supported |
| Flash Attention | Supported | Supported |
| KV Cache Quantization | FP8 supported | Partial support |
| Model Quantization | AWQ, GPTQ, Marlin | AWQ, GPTQ, EETQ |
| Speculative Decoding | Supported | Supported |
| Multi-GPU (Tensor Parallel) | Supported | Supported |
| API Compatibility | OpenAI-compatible | Custom + OpenAI-compatible |
| Installation | pip install | Docker-based |
Deploying vLLM in Practice
Basic Configuration
from vllm import LLM, SamplingParams

llm = LLM(
    model="meta-llama/Llama-3.1-8B-Instruct",
    dtype="float16",

    # === Memory Management ===
    gpu_memory_utilization=0.90,   # Use 90% of GPU memory
    max_model_len=32768,            # Maximum context length

    # === KV Cache Optimization ===
    kv_cache_dtype="auto",          # "auto", "fp8_e5m2", "fp8_e4m3"
    # kv_cache_dtype="fp8_e5m2",    # FP8 KV Cache → 2x memory savings

    # === Quantization ===
    # quantization="awq",           # Model weight quantization

    # === Parallelism ===
    tensor_parallel_size=1,         # Number of GPUs
)

params = SamplingParams(
    temperature=0.7,
    top_p=0.9,
    max_tokens=1024,
    stop=["<|eot_id|>"],
)

output = llm.generate("Explain quantum computing.", params)
print(output[0].outputs[0].text)
OpenAI-Compatible API Server
# Start vLLM server
python -m vllm.entrypoints.openai.api_server \
    --model meta-llama/Llama-3.1-8B-Instruct \
    --dtype float16 \
    --gpu-memory-utilization 0.9 \
    --max-model-len 32768 \
    --kv-cache-dtype fp8_e5m2 \
--port 8000# Client usage (OpenAI SDK compatible)
from openai import OpenAI
client = OpenAI(base_url="http://localhost:8000/v1", api_key="dummy")
response = client.chat.completions.create(
model="meta-llama/Llama-3.1-8B-Instruct",
messages=[
{"role": "system", "content": "You are a helpful assistant."},
{"role": "user", "content": "Explain quantum computing."},
],
temperature=0.7,
max_tokens=1024,
)
print(response.choices[0].message.content)Continuous Batching — Maximizing Throughput
The Problem with Static Batching
[Static Batching]
Request A: "Hello" → 50 tokens (finishes quickly)
Request B: "Write an essay..." → 500 tokens (slow)
Request C: "Hi" → 30 tokens (finishes quickly)

→ Must wait for the entire batch to complete
→ A and C sit idle waiting for B
→ Total time: ~B's time (inefficient)
Continuous Batching
[Continuous Batching]
Step 1: Process A, B, C simultaneously
Step 30: C completes → immediately inject new Request D
Step 50: A completes → immediately inject new Request E
Step 500: B completes

→ GPU always runs at maximum utilization
→ 2~5x throughput improvement# vLLM uses Continuous Batching by default
# Just send multiple requests concurrently — batching happens automatically
import asyncio
from openai import AsyncOpenAI
client = AsyncOpenAI(base_url="http://localhost:8000/v1", api_key="dummy")
async def send_request(prompt: str):
response = await client.chat.completions.create(
model="meta-llama/Llama-3.1-8B-Instruct",
messages=[{"role": "user", "content": prompt}],
max_tokens=256,
)
return response.choices[0].message.content
async def benchmark_continuous_batching():
"""Test Continuous Batching with concurrent requests"""
prompts = [
"What is Python?",
"Write a haiku about AI.",
"Explain gravity in one sentence.",
"List 5 programming languages.",
"What is the speed of light?",
"Describe photosynthesis briefly.",
"What is machine learning?",
"Name 3 planets.",
]
import time
start = time.perf_counter()
# Send all requests concurrently
results = await asyncio.gather(*[send_request(p) for p in prompts])
elapsed = time.perf_counter() - start
print(f"Total time for {len(prompts)} requests: {elapsed:.1f}s")
print(f"Average per request: {elapsed/len(prompts):.1f}s")
print(f"Throughput: {len(prompts)/elapsed:.1f} req/s")
asyncio.run(benchmark_continuous_batching())Speculative Decoding — Faster Decode
How It Works
A small model (Draft Model) quickly "guesses" several tokens, and the large model (Target Model) verifies them all at once.
[Standard Decode]
Step 1: Large model → token 1
Step 2: Large model → token 2
Step 3: Large model → token 3
→ 3 Large model forward passes

[Speculative Decoding]
Step 1: Small model → [token 1, token 2, token 3] (fast)
Step 2: Large model → verify all 3 tokens at once
→ ~3 tokens generated in 1 Large model forward pass# Speculative Decoding configuration in vLLM
python -m vllm.entrypoints.openai.api_server \
--model meta-llama/Llama-3.1-8B-Instruct \
--speculative-model meta-llama/Llama-3.2-1B-Instruct \
--num-speculative-tokens 5 \
--dtype float16 \
--port 8000Speculative Decoding Performance
| Task | Speedup | Acceptance Rate |
|---|---|---|
| Code generation | 1.5~2.5x | 70~85% |
| Natural language text | 1.3~2.0x | 60~75% |
| Math/reasoning | 1.1~1.5x | 40~60% |
The higher the acceptance rate, the greater the benefit. Tasks with predictable patterns — like code generation — see the biggest gains.
Memory Budget Planning
Practical VRAM Calculator
def design_memory_budget(
    model_name: str,
    model_params_b: float,
    num_layers: int,
    kv_heads: int,
    head_dim: int,
    gpu_vram_gb: float,
    model_quant: str = "fp16",       # "fp16", "int8", "int4"
    kv_quant: str = "fp16",          # "fp16", "fp8", "int8"
    target_context: int = 8192,
):
    """Practical VRAM budget planner"""

    quant_bytes = {"fp16": 2, "fp8": 1, "int8": 1, "int4": 0.5}
    model_bytes = quant_bytes[model_quant]
    kv_bytes = quant_bytes[kv_quant]

    # 1. Model weights
    model_gb = model_params_b * 1e9 * model_bytes / 1024**3

    # 2. CUDA Context + Overhead (~1.5 GB)
    overhead_gb = 1.5

    # 3. Available space for KV Cache
    available_gb = gpu_vram_gb - model_gb - overhead_gb

    # 4. KV Cache size per token
    kv_per_token = 2 * num_layers * kv_heads * head_dim * kv_bytes

    # 5. Maximum total tokens (sum across all batches)
    max_total_tokens = int(available_gb * 1024**3 / kv_per_token)

    # 6. Maximum concurrent requests at the target context length
    max_concurrent = max_total_tokens // target_context

    print(f"=== {model_name} on {gpu_vram_gb}GB GPU ===")
    print(f"Model ({model_quant}): {model_gb:.1f} GB")
    print(f"Overhead: {overhead_gb:.1f} GB")
    print(f"Available for KV: {available_gb:.1f} GB")
    print(f"KV per token ({kv_quant}): {kv_per_token} bytes")
    print(f"Max total tokens: {max_total_tokens:,}")
    print(f"@ {target_context} context → Max concurrent: {max_concurrent}")
    print()

    return {
        'model_gb': model_gb,
        'available_kv_gb': available_gb,
        'max_total_tokens': max_total_tokens,
        'max_concurrent': max_concurrent,
    }

# === Per-Scenario Designs ===

# Scenario 1: RTX 4090 (24GB) — Personal Server
print("=== Scenario 1: Personal Server (RTX 4090 24GB) ===\n")
design_memory_budget("Llama 3.1 8B", 8, 32, 8, 128, 24,
                     model_quant="int4", kv_quant="fp16", target_context=8192)

# Scenario 2: A100 (80GB) — Production
print("=== Scenario 2: Production (A100 80GB) ===\n")
design_memory_budget("Llama 3.1 8B", 8, 32, 8, 128, 80,
                     model_quant="fp16", kv_quant="fp8", target_context=16384)

# Scenario 3: A100 (80GB) — Long Context Agent
print("=== Scenario 3: Long Context Agent (A100 80GB) ===\n")
design_memory_budget("Llama 3.1 8B", 8, 32, 8, 128, 80,
                     model_quant="int4", kv_quant="fp8", target_context=65536)

# Scenario 4: H100 (80GB) — 70B Model
print("=== Scenario 4: Large Model (H100 80GB) ===\n")
design_memory_budget("Llama 3.1 70B", 70, 80, 8, 128, 80,
model_quant="int4", kv_quant="fp8", target_context=8192)Deploying TGI in Practice
Docker-Based Deployment
# Start TGI server (Docker)
docker run --gpus all -p 8080:80 \
    -v $HOME/.cache/huggingface:/data \
    ghcr.io/huggingface/text-generation-inference:latest \
    --model-id meta-llama/Llama-3.1-8B-Instruct \
    --dtype float16 \
    --max-input-tokens 4096 \
    --max-total-tokens 8192 \
    --max-batch-prefill-tokens 16384 \
--max-concurrent-requests 64# TGI client
from huggingface_hub import InferenceClient
client = InferenceClient("http://localhost:8080")
response = client.chat_completion(
messages=[
{"role": "system", "content": "You are a helpful assistant."},
{"role": "user", "content": "Explain the KV cache."},
],
max_tokens=512,
temperature=0.7,
)
print(response.choices[0].message.content)Performance Benchmarking
Measuring Throughput
import time
import asyncio
from openai import AsyncOpenAI

async def benchmark_throughput(
    base_url: str,
    model: str,
    num_requests: int = 100,
    max_concurrent: int = 16,
    input_tokens: int = 128,
    output_tokens: int = 256,
):
    """Serving engine throughput benchmark"""
    client = AsyncOpenAI(base_url=base_url, api_key="dummy")

    # Generate a fixed-length prompt
    prompt = "Write a detailed explanation about: " + "token " * input_tokens

    semaphore = asyncio.Semaphore(max_concurrent)
    results = []

    async def single_request():
        async with semaphore:
            start = time.perf_counter()
            try:
                response = await client.chat.completions.create(
                    model=model,
                    messages=[{"role": "user", "content": prompt}],
                    max_tokens=output_tokens,
                    temperature=0.7,
                )
                elapsed = time.perf_counter() - start
                tokens = response.usage.completion_tokens
                return {"elapsed": elapsed, "tokens": tokens, "success": True}
            except Exception as e:
                return {"elapsed": 0, "tokens": 0, "success": False, "error": str(e)}

    start_total = time.perf_counter()
    results = await asyncio.gather(*[single_request() for _ in range(num_requests)])
    total_time = time.perf_counter() - start_total

    successful = [r for r in results if r["success"]]
    total_tokens = sum(r["tokens"] for r in successful)

    print(f"=== Throughput Benchmark ===")
    print(f"Requests: {len(successful)}/{num_requests} successful")
    print(f"Total time: {total_time:.1f}s")
    print(f"Throughput: {len(successful)/total_time:.1f} req/s")
    print(f"Token throughput: {total_tokens/total_time:.0f} tok/s")
    print(f"Avg latency: {sum(r['elapsed'] for r in successful)/len(successful)*1000:.0f} ms")
    print(f"P50 latency: {sorted(r['elapsed'] for r in successful)[len(successful)//2]*1000:.0f} ms")
    print(f"P99 latency: {sorted(r['elapsed'] for r in successful)[int(len(successful)*0.99)]*1000:.0f} ms")

# Run benchmark
asyncio.run(benchmark_throughput(
    base_url="http://localhost:8000/v1",
    model="meta-llama/Llama-3.1-8B-Instruct",
    num_requests=100,
    max_concurrent=16,
))
Production Checklist
Here's a summary of items to verify before deploying to production.
Memory
- [ ] Confirm that model + KV Cache + overhead fits within GPU VRAM
- [ ] Set
gpu_memory_utilizationto 90~95% (leave headroom to prevent OOM) - [ ] Calculate the KV Cache space needed for max context x max concurrent requests
- [ ] Run quality tests after applying KV Cache quantization (FP8)
Speed
- [ ] Verify Flash Attention 2/3 is enabled
- [ ] Verify Continuous Batching is enabled
- [ ] Evaluate Speculative Decoding (is acceptance rate 60%+?)
- [ ] Measure Prefill and Decode latency separately
Reliability
- [ ] Configure graceful degradation on OOM (reject requests vs. queue)
- [ ] Set up a health check endpoint
- [ ] Configure request timeouts
- [ ] Set up GPU memory monitoring alerts
Cost
- [ ] Cost per token = GPU hour cost / tokens processed
- [ ] Evaluate whether quantization allows running on a smaller GPU
- [ ] Maximize throughput through batch size optimization
Want to run GPTQ, AWQ, GGUF and QLoRA yourself instead of reading our numbers? That is LLM Quantization and Compression Hands-On — 24 lectures, first 3 free.
Series Recap
| Part | Topic | Key Takeaway |
|---|---|---|
| 1 | Attention Internals | MHA/GQA/MQA, KV Cache fundamentals, Prefill vs Decode |
| 2 | KV Cache Optimization | Quantization, PCA compression, PagedAttention |
| 3 | Sparse Attention | Sliding Window, DSA, IndexCache, DMS |
| 4 | Production Serving | vLLM/TGI, batching strategies, memory budgeting |
Recommended Stack
[Personal / Small-Scale]
Model: Qwen 2.5 7B (GQA-4, small KV Cache footprint)
Quantization: GPTQ int4
Serving: vLLM + Flash Attention 2
KV: fp16 (7B models have small KV — quantization unnecessary)

[Production]
Model: Llama 3.1 8B or 70B
Quantization: AWQ int4 (8B) or fp16 Multi-GPU (70B)
Serving: vLLM + Continuous Batching + FP8 KV Cache
Extra: Speculative Decoding (for code generation, etc.)

[Long Context Agent]
Model: DeepSeek-V3.2 (built-in DSA) or Llama 3.1 + DMS
Quantization: AWQ int4
Serving: vLLM + FP8 KV Cache
Extra: IndexCache (for DSA models) or KVTC-style compressionNew posts on this topic go into the weekly newsletter. One email a week at most.
Part 4 of 4 complete
0 more part waiting for you
From theory to production deployment — subscribe to unlock the full series and all premium content.
Courses that go with this post
SOTAAZ course
Courses are sold one at a time. If you want all 13, there is a $199 lifetime bundle.
Subscribe to Newsletter
Related Posts
KV Cache Reduction, Measured on One A100 — Part 1: The Twelve Techniques Don't Pay in the Same Currency
Every list of KV cache techniques presents a dozen of them as peers. On one A100 the spread is enormous: prefix reuse cut a shared-prefix workload from 59.4s to 6.2s, while tuning the paged block size moved capacity by under 1%. The reason you cannot rank them on one number is that they pay out in different units.
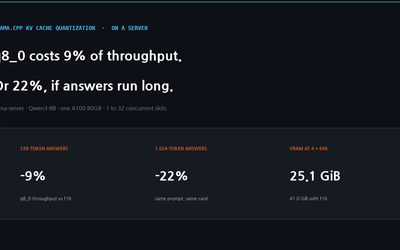
llama.cpp KV Cache Quantization: Why q8_0 Costs 9% of Throughput — or 22%
Mainline llama.cpp on one A100, Qwen3-8B Q4_K_M, llama-server with 1 to 32 concurrent slots. On a 32K prompt, q8_0 cost 9% of server throughput when each request generated 128 tokens and 22% when it generated 1,024, because prefill dominates the short case and prefill is unaffected by the KV type. Per-token decode was 34% slower, matching llama-bench. VRAM in use after startup fell from 41.0 GiB to 25.1 GiB at four 64K slots.
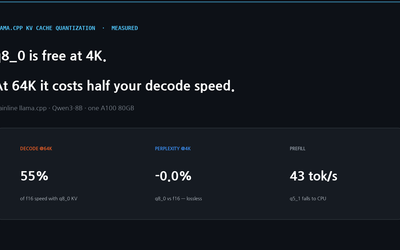
llama.cpp KV Cache Quantization, Measured on One A100 — q8_0 Is Free at 4K and Costs Half Your Decode Speed at 64K
Mainline llama.cpp, Qwen3-8B, one A100: -ctk q8_0 -ctv q8_0 matches f16 perplexity and cuts the 32K cache by 2.1 GiB, but decode at 64K depth drops to 55% of f16 (q4_0: 50%). Two other settings, q5_1 and a q8_0/q4_0 mix, silently ran prefill on the CPU at 43 and 63 tokens per second.